4 Dynamic Web Sites
In the previous chapter we looked at the configuration options for our web server software where we assume that the content being served up is static. A static website is a site where the data being served up is always the same unless you modify the files and change it. For the most part this is the type of website that you would have created in the Web Tech I course.
More interesting websites occur when the user can view information that changes over time or can interact with the website to make changes. Think of boring things would be on social media if you have to maintain the HTML/CSS yourself to post new items. Dynamic sites use a combination of a programming language and a data source so that pages can be changed each time that a page is loaded.
4.1 CGI Program
The first type of dynamic programming model for the web was called the common gateway interface (CGI) which was a standard way for programs to interact with the web server. Although we hardly write programs this way these days it is still worth creating a very small demonstration program so that we can get the idea of how these programs work and how they are configured. Sometimes you are asked to deploy some software that is written this way.
The first thing that we will do is write a small program using the Python language since everybody is familiar with it due to the prerequisites for this course. Things will be a bit different because we will be setting up the program to be run outside of an IDE where we normally write it.
#!/usr/bin/python3
import datetime
print("Content-Type: text/html\n")
print("This is a python program<br>")
now = datetime.datetime.now()
current_time = now.strftime("%H:%M:%S")
print("Current time is ", current_time)
The first line of the program is a bit unusual, it is a comment but the #! indicates that it is a special comment that the operating system will use to determine what type of program it is. In this case when we run the program we will use the python3 interpreter. The rest of the program is just standard Python with the exception that we started with the output “Content-Type: text/html” followed by one blank line. Hopefully you recognize this from the HTTP chapter that we studied in the first part of this course. Another thing that we should do is to make the program executable and we will place this file into the /usr/lib/cgi-bin folder.
In order to run CGI scripts on a Linux server you need to enable the cgid module and restart the apache server. This module will be configured by default to take any request that comes on the URI /cgi-bin from a site and run the corresponding script in the /usr/lib/cgi-bin folder.
If we called the Python file demo.py then we could start this script by visiting the URL http://192.168.132.11/cgi-bin/demo.py. The interesting thing of course isn’t that we see the Python file but rather we see the output of the result of running the Python program. Since the program included the current time, each time that you load the file, you will see a new time appearing. The output from the Python program of course has be HTML in order for any formatting to work.
4.2 Fast CGI Programs and Proxy Forwarding
The CGI specification has been around since the early days of the internet and it works by having the web server convert each request into the running of the program. This is fine and it works but the problem has to do with performance. Each time that a request comes into the server a new copy of the program needs to be run.
In order to make things faster, one trick is to load the program once and leave it running and only process the request. This would help with the performance by avoiding the demand paging that most operating systems implement. The FastCGI approach requires another service which is running all of the time. This service can be a process on the same physical server or it can even be on a different computer.
Configuring a FastCGI service is considerably more complicated even for a simple demonstration like what we did in our application that printed a welcome message followed by the time. Here we will rewrite the Python program using the fastcgi module will will do all of our communication with the web server.
#!/usr/bin/python3

from fastcgi import fastcgi
import os
import sys, datetime

@fastcgi()
def hello():
    sys.stdout.write(f"Content-type: text/html\r\n\r\n<html>")
    sys.stdout.write(f"This is a FastCGI service<br>")
    now = datetime.datetime.now()
    current_time = now.strftime("%H:%M:%S")
    sys.stdout.write("Current time is " + str( current_time))
    sys.stdout.write("</html>\r\n")
The code is quite different. You will notice that there is no main code. The @fastcgi directive tells the python interpreter to run the built-in main program that creates a Unix domain socket in the current folder so that the web server can communicate with it. Otherwise when you run the program, it looks like the application has just hung and isn’t responding but in reality it is listening on a socket in the current folder for incoming connections.
[ sequence diagram for a FastCGI ]
4.3 PHP
Love it or hate it, PHP is still one of the most popular backend web programming languages so it get is own section in this chapter. PHP was programming language designed to be mixed together with HTHML inside the tags <?php and ?>. When a page is loaded anything inside these tags will be processed and replaced by any output.
Consider the following program:
<h1>Current Time</h1>
<?php
$date = date('d-m-y h:i:s');
echo "The current time is $date<br>";
?>
The first line is just regular HTML so that would be displayed directly The next 4 lines however switch to PHP mode and so a properly rendered output would not show the code but only the result of the echo statement.
4.3.1 mod_php
Although we will do this in the lab, it is recommended that instead of mod_php that you use the FastCGI deployment instead as described in the next section.
The easiest way to run PHP using Apache is the mod_php module. This is very simple to install and get running. The simplicity comes at a price because mod_php runs like the old CGI script where each time you load a page involving PHP, the PHP interpreter is loaded and the input file is parsed and the program is run.
Installing the module requires two things, maybe!? I have to say the word maybe because depending on the order that things get installed you might be able to skip some steps as the Ubuntu package for PHP will usually install mod_php which can actually cause you trouble if you didn’t want it installed (because you wanted the FastCGI version instead).
The name of the Ubuntu package is libapache2-mod-php. I would avoid specifying the version number (i.e. libapache2-mod-php7.4) and just use the unnumbered version which would give you the latest officially supported version for your Linux distribution. Once this package is installed head to your Apache configuration and verify the following.
There should be a phpX.load and phpX.conf in the /etc/apache2/mods-available folder. You can then check the /etc/apache2/mods-enabled folder to see if the symbolic links have been put in place. If not then you will need to enable to module with the a2enmod phpX.conf command (replace the X with the version number of course) and restart the apache server.
If you look at the phpX.conf file you should see a directive like this:
<FilesMatch ".+\.ph(ar|p|tml)$">
    SetHandler application/x-httpd-php
</FilesMatch>
This tells apache that any files that end in .php, .phar, .phtml will all be processed using the x-httpd-php handler.
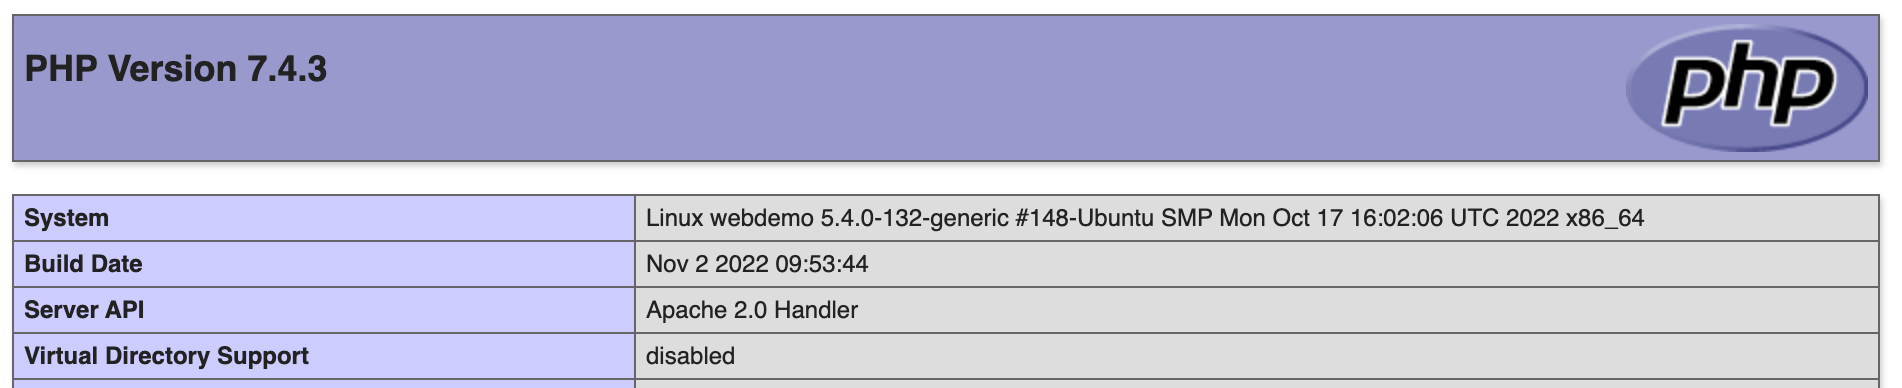
To verify that things are working correctly, the best thing you can do is to write a small PHP file containing the single line phpinfo() and then visit the page using your browser. You will want to make sure that you do not actually see the code but instead you see the configuration information about PHP. The item of interest besides the version number is the Server API line which should say “Apache 2.0 Handler”.
4.3.2 FastCGI Process Manager (FPM)
If you search around on the internet about mod_php and FPM you will find many people suggesting that FPM will be faster… after all it contains the word “fast” in it! But in reality you don’t get any performance improvements unless you building up a cluster to run PHP distributed across many nodes. However it is still important to know how to configure this as it is the only way to interface Apache to other server side programs and is the only way to interface PHP to nginx and Microsoft IIS.
In mod_php, the PHP libraries are just loaded along with Apache itself. When a request comes in with the .php extension, Apache simply calls the PHP code to interpret the request and translate the PHP into HTML. When using FPM, PHP is run in a separate process and a message is sent from Apache to the PHP process and waits for a response. This additional request and response does cost time.
Are we gaining anything from using FPM? The big gain comes from a security point of view. When using mod_php, the application is run as the www-data user (in Ubuntu) but when using FPM the PHP process will execute the code as the owner of the file.. so if you are careful in your ownership settings in the /var/www folder you can run the code as a user with less privileges.
| Attribute | mod_php | CGI | suPHP | FastCGI |
|---|---|---|---|---|
| Memory usage | Low | Low | Low | High |
| CPU usage | Low | High | High | Low |
| Security | Low | Low | High | High |
| Run as file owner | No | No | Yes | Yes |
| Overall Performance | Fast | Slow | Slow | Fast |
As you can see from the table there isn’t really any performance increases directly. However if you were to build up a cluster of PHP processing nodes (whose job is to only run PHP) then it is possible that you could off-load the heavy PHP CPU activity to other machines providing that the network was fast enough.
In order to configure FPM on Ubuntu, you will need to install the php-fpm package. This will not automatically enable FPM, you still need to reconfigure apache in order to use these new modules.
You will need to disable the phpX configuration and enable the proxy_fcgi and setenvif modules as well as enabling the phpX-fpm configuration. The phpx-fpm.conf file contains from the conf-enabled folder holds the magical setting that makes everything work:
    <FilesMatch ".+\.ph(ar|p|tml)$">
        SetHandler "proxy:unix:/run/php/php7.4-fpm.sock|fcgi://localhost"
    </FilesMatch>
We have seen the FilesMatch directive before which is telling use that any files that end in .phar, .php, .phtml should be handled by the FPM module. The long string in the SetHandler directive is telling apache to pass the request (called a proxy) to fcgi handler on this same server (localhost) by communicating with the Unix socket found at /run/php/php7.4-fpm.sock. Sockets are used to communicate between two processes and you will have seen this in either the Operating Systems course or the network programming course.
To verify that the configuration is done correctly, you would need to restart the apache server and once again visit your test.php file. This time you should see the name FPM/FastCGI for the ServerAPI.

Upon changing the processing from mod_php to fpm_php, you might not really see any significant improvements unless your site is heavily loaded. We will learn about how to heavily load a site using a Python library in the course.
4.3.2.1 nginx
As mentioned in the previous section, if we are using the nginx server then there is no choice but to use the FPM approach of dealing with PHP code. You will still obviously need the php-fpm package installed before you can start.
The configuration is typically done on a site-by-site basis and the following would be placed into a server context:
    location ~ \.php$ {
            fastcgi_pass unix:/run/php/php7.4-fpm.sock;
            include fastcgi.conf;
    }
Reading this configuration is quite straightforward compared to the apache version. It says to match everything that ends in .php and forward it to the FastCGI process on the Unix socket at the location /run/php/php7.4-fpm.sock. Unfortunately the include fastcgi.conf is required as well since there are number of variables that are set by the file.
4.4 Node.JS Express
Node.JS has become a very popular server side scripting which is heavily based on the JavaScript programming language. We will not be able to cover the programming language here but we will be looking at the language from a deployment point of view given that most of the time these types of server programs are placed behind a proxy.
Unfortunately the node.js version supplied by the standard apt package for Ubuntu is ancient! As I am writing this document Ubuntu 22 will deploy node.js version 12 but node.js version 18 is the latest version. Almost no developer will be interested in using a node.js version that is many years behind. To install a more recent version of node.js requires that we either compile the package from source or we install a private package archive (PPA). Compiling the interpreter from source is very long (expect an hour and a lot of additional package installations needed) while installing a PPA can cause you maintenance problems when you try to upgrade you Ubuntu server version.
Regardless of the ancient version of node.js we will proceed in this course using whatever the officially supported version of node.js is available under Ubuntu. The purpose of this course is not to be writing node applications but rather to be configuring web servers that can serve up the output of the node applications. I will assume that you have updated to Ubuntu 22 which will provide node.js v12.
We will need to start by installing the node.js package which can be done by apt install nodejs. Once this package is installed try running nodejs -v to check the version number to make sure you have version 12. You will also need to install the node package manager with the command apt install npm.
4.4.1 Test Application
We are going to build a very simple web service that prints out the current time along with a small header like we have been doing before.
You will need to put the application in some folder so we will pick the /var/www/nodedemo. You will need to go to that folder and run the command npm init to create a basic information file then npm install express to download the web service library that we will use.
Once installed we can write the application:
const express = require('express')
const app = express()
const port = 3000

app.get('/', (req, res) => {
  let now = new Date()
  let page = '<h1>This is a NodeJS Application</h1>' + now
  res.send(page)
})

app.listen(port, () => {
  console.log(`Example app listening on port ${port}`)
})
This application creates a web service that is connected to port 3000 that when somebody asks for the root resource (i.e. http://192.168.30.132/) the application will return a small page containing an h1 header followed by the current time. You can run the application from the command line using node main.js (assuming that you called the file main.js) and then try visiting the page using the browser but pointing at port 3000.
Although it is possible to have the express application bind directly to port 80, most deployments would not do this due to security concerns. If you did this, you would be responsible for everything including handling the deployment images, the deployment of simple HTML files and even the HTTPS certificate management all by hand. Most deployments would let this application run on port 3000 and we would configure a front end server (either apache or nginx) to handle the main traffic and send only the requests that need to go to node via a proxy like we were doing in the FastCGI approach.
4.4.1.1 Apache2 Proxy Forward
Since this time we will be forwarding requests to an HTTP service rather than a FastCGI service we will need to enable the proxy_http module from apache with a2enmod proxy_http. Once that is done we can make a very simple Directive in our VirtualHost configuration
<VirtualHost *:80>
    ServerAdmin robert@donot.bother.me
    ServerName green.demo
    DocumentRoot /var/www/green
    ErrorDocument 404 /missing.html
    ErrorLog ${APACHE_LOG_DIR}/error.log
    CustomLog ${APACHE_LOG_DIR}/access.log combined
    ProxyPass "/code" http://localhost:3000
</VirtualHost>
The final line in the configuration is the ProxyPass which says to map everything that starts with /code to be sent to the localhost on port 3000.
4.4.1.2 nginx Proxy Forward
Configuration a proxy on nginx is not very difficult but does require careful attention to the slashes!
server {
    root /var/www/green;
    index index.html;
    server_name green.test.demo;
    rewrite ^/photos/(.*)$ /pictures/$1 redirect;
    location / {
        try_files $uri $uri/ =404;
    }
    location /code/ {
       proxy_pass http://localhost:3000/;
    }
}
Similar to the configuration of Apache we are are going to send everything that starts with /code/ to the HTTP server listening on port 3000 of the current server. Note the trailing slash at the end of the proxy destination.
4.5 Databases
Having PHP, or some other programming language running on the server, generating HTML for the browser to display it nice but where does it get its data? If you think of a site like amazon.com, the product descriptions, the prices, the reviews, etc all need to be stored somewhere for the scripting engine to generate the correct HTML. A common place to keep data is in a database management system such as MySQL or MongoDB. These two databases are by far the most common databases in existence on websites currently so it makes sense that we focus on those two items. The purpose of this section in the book is not to cover the basics of database design but rather we want to cover the management of the databases which includes the deployment of datasets to our server and the user management. I assume that the reader is fluent in MySQL type databases as well as MongoDB as they are covered in the INFS2201 course which should have been taken in the second year.
Unfortunately each system has slightly different terminology so there can be some confusion.