2 HTTP Protocol
To transfer HTML files from a web server to a browser on your computer requires some sort of protocol. The hyper-text transfer protocol (HTTP) was developed for he primary purpose of transferring such files. The protocol was designed to be client initiated where the client requests some information and the server responds with the information.

The message from the client is called the request and the message from the server is called the response. The server itself however never initiates any of the requests, it is always done by the client. This technique is called a “pull” which makes HTTP a challenge to use in a “push type” environment. If you think about WhatApp web, this type of application shows new messages immediately as they are typed by the person at the other end of the chat. One way that this can be implemented is to have JavaScript on your browser check every few seconds to see if there is a new message and display when there is and this is the only way that works with plain HTTP requests/responses and is called “polling” which is quite wasteful. The actual WhatsApp website uses a completely different technique called WebSockets which is currently outside the scope of this book.
The HTTP was small enough that the specification has remained relatively stable and even now after X years the version is still only 1.3 with the last two changes mostly being centered around performance changes.
Generally we call the HTTP client a browser but in general a client is just any device which accesses a resource (a file) from a server using the HTTP protocol. This could be a web browser such as Chrome or it could be an application on a mobile phone or some application on your desktop computer that is fetching remote information.
2.1 URLs
All items on the web need to have a unique identifier so they can be requested by the client. The name of this unique identifier is the URL (uniform resource locator) and it follows the form:
protocol://hostname:port/resource-pathThe protocol in this course is generally either http or https but there are other possibilities such as ftp, sftp, ssh, etc. You have likely seen sftp from your Web Tech I course where you accessed the “sit” server and had to type sftp://sit.cna-qatar.edu.qa.
The hostname is the name of the server that you are trying to reach. Of course you cannot reach a hostname directly without a DNS translations and it is possible to put the IP address of the server as the hostname if there is no DNS. In our course, we will start by using the IP address only until we cover the section on DNS at which point we could use the hostname instead.
The port number is referring to the TCP/IP port that you learned in your networking course. Port numbers are values between 1 and 65535. Each service running on a server needs to be bound to one port number so that the operating system can route incoming packets to the correct application. A very important rule here is that no two programs can use the same port number at the same time. Although a web server can be configured to use any port, generally you configure your server to listen on port 80 for regular http traffic and port 443 to accept https traffic.
The final part of the URL is the resource-path. Each item (usually a file) on a web server will of course need to have a different file name and just like on a computer we can store files inside different folders. So the resource-path could be something like ‘/webserverbook/chapter1.html’ indicating that the file is chapter1.html and it is located in a folder called ‘webserverbook’.
2.1.1 URI vs URL
The HTTP specification talks of something called a URI (uniform resource identifier). The actual difference is that the URL refers to the entire web address including the protocol, server, port and path. A URI on the other hand is a more general description of some sort of unique identifier. For example the bar code on the item at the supermarket is a URI that allows the point of sale system to find the description and price of an item so it can be printed on the receipt. In the HTTP specification the URI refers to the path within the server. A URL is also a URI but there is no guarantee that a URI is actually a URL.
In the Web Server Management course we can use the two terms interchangeably.
2.2 HTTP Requests
In the Web Tech I course, you would have learned that an HTML page consists of a head and a body. The HTTP protocol messages also contain a header and a body and a single blank line between the two sections.
2.2.1 Header
The request header starts with a “Request Line” indicating what method the client would like to perform on the resource followed by the URI for the resource and the version number of the HTTP protocol that will be used.
For example we could have a request that starts with:
GET /webserverbook/chapter1.html HTTP/1.1This indicates that the client would like to “GET” the file /webserverbook/chapter1.html using version 1.1 of the HTTP protocol specification.
The word GET was covered in the Web Tech I course where you were introduced to forms. You would have see two method words called ‘GET’ and ‘POST’. Generally the word GET means that you are asking to retrieve from information from a server while POST was used when you wanted to modify some item on the server.
Officially there is a huge list of methods such as: GET, POST, PUT, DELETE, PATCH, HEAD, and OPTIONS. Only the GET and POST can be used by traditional web forms, the other methods can be used by single page applications and other devices. In our course we will only be looking at GET and POST and the other methods are actually quite similar.
The URI is the file on the server that the client is trying to obtain.
The protocol version must be something that the web server supports. The server server will respond with a response indicating which version they are speaking and you will probably discover that most web servers will speak version 1.1 of the protocol. If you try to request and older version like 0.8, you will likely get a rejected message and if you try to request some non-existent version like 2.4 you will get back a response of 1.1.
Note that the letters HTTP is the specification even if you are asking for a request using the https protocol. The https protocol is just HTTP over a TLS connection so it follows the same HTTP protocol specification once the connection is established.
In addition to the request line, you must provide at least one option called ‘Host’. For example if we wanted to request the resource https://webit.cna-qatar.edu.qa/wsmbook/chapter1.html we would have the request:
GET /wsmbook/chapter1.html HTTP/1.1
Host: webit.cna-qatar.edu.qa
The Host line provides the server the name of the host. Although it seems silly to do this, web servers can be configured to support multiple websites from a single IP address.
2.2.2 Keep Alive Connections
There is a common Header option that we will be using in this course which is the “Connection” string. Typically in class you will see the instructor use the option
Connection: closeThis directive tells the server that after handing back the request resource it should close the connection to the client. We would like to use this when using the Manual Web Client but generally the option should be ‘Connection: Keep-Alive’.
Since HTTP uses TCP/IP as a transport mechanism, creating and tearing down a connection each time we ask for a single resource on a website is wasteful since we must do the TCP/IP handshake. If you look at most interesting pages on the internet, you would find that usually around 10 files minimum will be loaded including things like fonts, images, JavaScript and CSS. It doesn’t make sense to close the connection after asking for each of these individual items. Most browsers would use the Keep-Alive option. Our manual web client uses the Close option since we are not asking for multiple files and if we leave the connection open, we cannot render the page until the timeout happens on the server.
2.3 Header Body Separator
A single blank line is used to separate the head and the body. This blank line is not optional and if you leave it out, the server will wait for it to be sent until the server finally times out, which is usually after 30 seconds.
2.4 Body Contents
The contents of the body can vary from message to message. For example if we were uploading form data, then the parameters would be put here, if we were trying to upload a PDF document to a website then the body would contain the PDF file or at least a part of it. Many requests however actually have no data at all.
2.5 HTTP Responses
An HTTP response consists of a head and a body just like the request. The response of course is transmitted by the server as a response to a request. There is no such thing as a response which is spontaneously generated by a server.
The response header and body are separated by a single blank line just like the HTTP request.
2.6 Response Header
The first line in the header is called the Status Line which consists of the HTTP version, the status code and a description of the response. For example we will often see a response such as:
HTTP/1.1 200 OKThis line indicates that the server is using the 1.1 of the HTTP protocol spec. The response code is 200 and the word “OK” is human readable version of the 200 code. The code itself is the response so even a message like “HTTP/1.1 200 Bad Request” tells us that the request worked correctly.
We will cover a number of the status codes in this course but there is no reason to cover all of them. We will focus on the ones that happen more frequently.
Following the status line is a collection of response header fields. We will cover the important ones as we go through some of the requests.
2.7 Response Body
Most of the time the body of a response will be HTML but it could be other items. For example if you download a Word document then we wouldn’t send back HTML but instead it would be parts of the word document we need to send. We can look at the ‘Content-Type’ header to determine the type of the body.
2.8 Basic Requests and Responses
Rather than trying to cover all of the possible options about the request and responses used in HTTP, I think it would be helpful to consider scenarios and we will start with a very basic situation.
Suppose that you already have a page loaded on a browser and you have a link to click on which is formed using the HTML code:
<a href='http://server.domain.com/documents/details.html'>When you click on this link, you end up seeing what is on that page but in this section of the course, we want to know exactly what the browser and the server does.
Clicking on a link would cause the browser to create an HTTP request with the following:
GET /documents/details.html HTTP/1.1
Host: server.domain.com
<blank line>
This message is sent using TCP/IP to port 80. The browser would likely include other directives but this is enough to get the request processed by the server.
The server would receive this request and try to locate the details.html file inside the documents folder in the DocumentRoot (we will see the DocumentRoot in the Apache section). Let’s suppose that the document does exist and the server has be configured to allow the request, the server would then create a response similar to the following:
HTTP/1.1 200 OK
Date: 08 Apr 2023 17:30:34 GMT
Server: Apache (Ubuntu)
Content-Length: 2034
Content-Type: text/html

<html>
<head>
  <title>Details Document</title>
The response code of 200 is important as it tells the browser that the response does not contain an error or something else that it must act upon. The date and server simply indicates the time the response was made and the type of server that served up the response; these are not actually required but generally they are always returned.
The Content-Type and Content-Length indicates that there are 2043 bytes of HTML coming in the body of the message. Once the body has been read by the browser it can now try to interpret the HTML tags to render the page.
2.9 URI Not Found
A typical problem that we face on the internet is clicking on a link that seems to not exist. Sometimes this is because the person who made the HTML file set the wrong link path or else the link was working but somebody moved or erased the page that it referred to.
You have likely see pages with a message like “404 The page was not there”. The number 404 is actually the status code for “not found”. If you tried to request a page that wasn’t there you will likely get back an HTTP response like this:
HTTP/1.1 404 NOT FOUND
Content-Length: 1432
Content-Type: text/html

<html>
<head>
<title>Page not found</title>
etc...
The 404 is actually the indication to the browser that the page was not found but the server will also typically send back from HTML in the body that could be displayed to the user. The HTML could contain an email address of somebody to contact but generally it just contains a link to the home page of the web server so that you can go back. The 404 code is actually really important, the Google search engine will pick up on the 404 errors and will email the site administrator to let them know that there are links that could not be followed.
2.10 Redirection
You might have noticed that sometimes you will see a link on a website with a certain URL but when you click on it, you end up at another URL instead. This is called a redirect and is used for doing things like sending a person from http to https or to a new domain if the company wanted to change from say .com to .com.qa. If you want to try this, type in http://sit.cna-qatar.edu.qa, you will find that you will end up on the https version of the site instead. This is because the server has been configured to redirect requests to the secure version of the site.
The two codes used in server-side redirection are 301 and 302. We’ll cover these in a few minutes but first let’s look at a typical response:
HTTP/1.1 301 Moved Permanently
Date: 08 Apr 2023 13:23:11 GMT
Server: Apache (Ubuntu)
Location: http://www.google.com
Content-Type: text/html
Content-Length: 4323
The code of 301 is an indication that the browser should not show the HTML (even if it is included in the response) but instead should immediately go do a different URL. The URL is found in the header Location. In this case there is an indication that the browser should go to the URL http://www.google.com. The HTML is provided just in case the browser could not actually go to the next URL but all normal browsers just go automatically.
2.11 Permanent vs Temporary Redirection
The 301 code shown above is a permanent redirection. The code 302 is a temporary redirection and the description is typically the word “Found”. What is the difference? Clearly the temporary redirection is just temporary while the permanent means for all time.
So why have permanent and temporary redirection? Again we need to think about this from the search engine’s point of view like the google spider. The Google spider is a program that visits every website in the world that it knows about and builds up a huge database about which key words exist on each page. When a website manager wants to move a document from one page to another, this disrupts the google spider. The administrator has the option of flagging old pages as being redirected and can pick either permanent or temporary. If the redirection is temporary, the google search engine database would not bother recording anything because it is just a temporary move. If the administrator configures the page as being moved permanently then the Google spider will erase the old entry from its database and record the new one.
2.12 Relative and Absolute Paths
The path that is returned in the Location header can be a relative URL, an absolute URL within the same server or even an absolute path to a completely different server using a completely different protocol.
For example lets suppose that you tried to access the resource http://www.nothing.com/webcourse/details.html and got back a 302 with:
* Location: other.html This is a relative path indicating to request the URI /webcourse/other.html file from the same server.
* Location: /other.html This is an absolute file path but on the same server. The URI in this case for the next request would be /other.html
* Location: https://www.other.com/other.html This is an absolute path indicating that the request is for /other.html on the server www.other.com using the protocol https.
2.13 Server Side vs Client Side
There is a clever alternative for doing redirection. Perhaps in the Web Tech I course, you might have found this one. If you include the following line in a web page:
<meta http-equiv="refresh" content="5; url=http://www.nothing.com">Your page would be shown for 5 seconds and then the browser would be sent to www.nothing.com. The server actually doesn’t know anything about this type of redirection and would send back a “200 OK” message. This is called a client-side redirect because the server isn’t actually aware of the redirection.
2.14 Language Support
A very underutilized feature of HTTP by most websites is the ability to provide a preferred language that you would like to see the pages in. For example, the MoI website does a good job at showing both English and Arabic and it allows for people to easily switch between the two but it would be really cool if they could predict in advance what language the user would prefer to see.
Most web browsers allow you to set a preferred language and this changes some fields in the HTTP request. The server can use the request language string to make decisions about which language to send back.
Consider the following simple request with the addition of the ‘Accept-Language’ directive:
GET /demo/language/main.html HTTP/1.1
Host: sit.cna-qatar.edu.qa
Accept-Language: fr
The code “fr” is the 2 letter ISO language code for French. Therefore this HTTP request is trying to access a resource called “main.html” in the “/demo/language” folder and it is asking if the server can hand back the page using the French language.
If non-standard languages are supported for a resource, you will get a response with a ‘Content-Language’ response such as:
HTTP/1.1 200 OK
Content-Length: 97
Content-Type: text/html
Content-Language: fr

<div>some text in french that is 97 characters long</div>
The purpose of the Content-Language directive is to indicate which language the server actually responded with. Just because you would like to get a page in French doesn’t mean that the server is capable of actually giving it back!
The Accept-Language command is actually very flexible and can support multiple languages by using a string like
Accept-Language: en, fr;q=0.5, ar:q=0.2This string suggests that we would prefer English and are good at it. However if the page cannot be provided in English then we can speak French and Arabic but we would prefer French over Arabic. In this course we do not have to worry about multiple language requests.
Supporting multiple languages on the server is actually very easy. If you were trying to support English and French on the main.html file mentioned above you just need to enable the languages and then create files called main.html.en and main.html.fr.
2.15 User Agent String
The “User-Agent” header can be used to inform the web server which browser has made the request. Although it is entirely voluntary, most browsers include such a string for each request.
The common format of this is:
User-Agent: Mozilla/5.0 (<system-information>) <platform> (<platform-details>) <extensions>A couple of examples are:
Mozilla/5.0 (Windows NT 6.1; Win64; x64; rv:47.0) Gecko/20100101 Firefox/47.0
Mozilla/5.0 (Macintosh; Intel Mac OS X x.y; rv:42.0) Gecko/20100101 Firefox/42.0
Mozilla/5.0 (X11; Linux x86_64) AppleWebKit/537.36 (KHTML, like Gecko) Chrome/51.0.2704.103 Safari/537.36
These strings are a bit tricky but the first one is Firefox v47 running on Windows. The second string is Firefox v42 on MacOs and the final string appears to some strange Chrome/Safari hybrid but it is really Chrome 51 running on Linux.
Our ManualWeb client doesn’t send any User-Agent string by default but some of the exercises that I ask you do, you are requested to provide a User Agent string of the form “mwc/60061234”. The mwc stands for manual web client and the ID of course is your student number. I am slowly converting the website to detect when students have finished exercises so that I can provide some automatic grading.
2.16 Site Names
We have been using the “Host” directive for all of our requests and now it is time to talk about what it actually is used for.
People who work in non-it related industries such as dentists and car repair certainly want to have a website so that potential customers can find them. These types of companies usually do no employ IT staff because they are expensive and they really are not in the business of running web sites. Often these companies will use what is called “Shared Hosting” where a single server runs many websites at the same time. The benefit is that by sharing the server the cost can be significantly reduced.
When a request comes into a web server that is hosting multiple websites, the server must look at the Host line to make a decision about which set of files to return.
Consider the following requests:
GET / HTTP/1.1
Host: qatardental.net
and
GET / HTTP/1.1
Host: honeymaplegrove.com
When you type the URL into a web browser these two requests both get sent to the same IP address (92.53.241.41 … at least that what it was the day that I wrote this paragraph). There were actually 100 different hosts on the same IP address and the server looks at each request to decide which site to send back.
In case you are wondering, yes, putting 100 websites on a single server is going to make it slow for everybody sharing the server. Generally websites that go onto shared hosting sites are for very small companies with minimal budget and other than providing just a list of services that they provide, the website probably doesn’t actually get used for anything like like high volume shopping. A website such as amazon.com is most likely on a server by itself or even more likely is spread across a lot of servers to handle the large amount of traffic that is expected.
2.17 Sending Data to the Server
So far we have only talked about how to get information from the server to the client using HTTP. Now we must consider how data is transferred from the client to the server.
In the Web Tech I course, you should have learned how to create HTML forms that allow the user to type in information and then click a submit button. You are also familiar with two different actions called ‘POST’ and ‘GET’.
Let’s look at two forms and what happens at the HTTP request level when the user clicks on the submit button.
<form action='dosomething' method='get'>
   User: <input name='user'>
   Phone: <input name='phone'>
   Other: <input id='other'>
<input type='submit'>
This form contains a total of 4 inputs but the input that we labelled ‘Other’ is not actually part of the form because that input does not have a name attribute.
When you click on the submit button the user and the phone number will be transmitted to the server using the GET method. In the GET method, the parameters are included as part of the URI.
GET /dosomething?user=hello&phone=1232 HTTP/1.1
Host: somehost.com
<blank line>
You can see the two parameters appearing in the URI just after a ? symbol. The parameters are name=value pairs with the & symbol separating them. You can actually see these parameters appearing in the browser’s address bar. To see such a site in action, go to google.com and search for something then look at the address bar to see the parameters.
If we where to modify the form to use a “post” method instead the HTTP request looks considerably different.
<form action='dosomething' method='post'>
   User: <input name='user'>
   Phone: <input name='phone'>
   Other: <input id='other'>
<input type='submit'>
In this case the same comment about the inputs holds true and there are only two inputs which are user and phone. The data however gets to travel along in the body of the message which requires that we set the Content-Type and the Content-Length fields. Let’s see how the request would be generated by the browser first and then talk about the new fields:
POST /dosomething HTTP/1.1
Host: someserver.com
Content-Length: 21
Content-Type: application/x-www-form-urlencoded

user=hello&phone=1232
The parameters appear after the blank line which means that they are being transmitted in the body of the HTTP request. The Content-Type has been set to indicate that the data in the body is using url encoded form parameters (the name=value pairs separated by &). The Content-Length has to contain exactly the number of bytes in the response. If you set the content length to be too short, the server will ignore the rest of the message and if you set it too long, you will get a timeout because you told the server to expect more bytes than you actually end up sending.
There are many types of data that could be sent. The HTML form type is always the application/x-www-form-urlencoded but we could easily upload pdf files, word documents, json data, etc. We will see the transfer of json data in a later section in this chapter.
The visible difference between the GET and POST methods is that in POST you do not actually see the parameters in the address bar but there are other troubles that we will not discuss in this course because they are more about web page design rather than HTTP protocol.
2.17.1 Encoding Parameters
Imagine that the user was given the form:
<form action='dosomething' method='post'>
   User: <input name='user'>
   Phone: <input name='phone'>
   Other: <input id='other'>
<input type='submit'>
If the user entered “briggs & stratton” for the name, “x=123” for the phone number, lets think about what the body would look like.
name=briggs & stratton&phone=x=123You can see from this string that the server will probably mistake the first & as the separator for the name. To overcome this problem we need to learn about percent encoding. Let’s apply percent encoding first and then explain what it means. The browser would actually send the following
name=briggs%20%26%20stratton&phone=x%3D123Notice that this new string is of the form “name=value” and we have the & in the middle separating the parameters. The “special characters” such as the spacees, the ampersand and the equal sign have been converted into “percent encoded symbols”. Percent encoding is very simple, when you see a % symbol you then write the ASCII value (in hexadecimal) as the next two digits. For example the & symbol is 26 in hexadecimal. When we encode parameters in either the URL (GET parameters) or the body (POST parameters) we should encode anything that is special. Watch out that the + symbol is allowed to be used to represent spaces!
2.18 Website Authentication
Many websites would like to have the ability to allow only certain people access to certain parts of a website. For example in D2L we would like the instructor to be able to see the grades of all students but a student should only be able to see their own grades. This is done through a process that we describe as “Authentication”.
There are many ways that websites can implement authentication and we consider 3 of these in our course: basic authentication, cookie based sessions, and web tokens.
2.19 Basic Authentication
Suppose you click on some link and get back a response like this:
HTTP/1.1 404 Unauthorized
WWW-Authenticate: Basic realm="INFT3203 Test Answers"
Content-Type: text/html
Content-Length: 400

<p>You do not have permission to view this site</p>
This 404 code is an indication to the browser that you simply do not have the permission to view the page. The message in the body is just for convenience and this may or may not actually be shown in the browser. The browser will generally pop up a small dialog box asking for a username and password. Once the user enters the details the browser will try again but this time using an Authorization field in the header.
Suppose that for this particular resource, the username is ‘power’ and the password is ‘supply’. The browser would combine the username password into a string of the form ‘power:supply’ and then compute the Base64 encoded version of this string. Then the following message would be sent to the server:
GET /somelink HTTP/1.1
Host: somehost.com
Authorization: Basic cG93ZXI6c3VwcGx5
<blank line>
The server would then respond with the page contents as normal.
The browser would remember this username:password combination for each time it tried to access any resource in the same “realm” until the browser was closed.
Basic authentication is really just… basic. The server cannot do anything interesting like ask the user to login again because the user left the browser idle for many days. Also the browser must send the username/password combination each time. The base64 encoding doesn’t do anything in terms of security other than to make it difficult for somebody to shoulder surf and notice your password. There is an assumption that if you are going to send a username/password, you should be doing this over HTTPS. Despite its limitations, it is a convenient way to protect what is going to be a public website before you are ready to release it.
2.20 HTTP Sessions
The HTTP protocol is itself a stateless protocol. This means that each request/response is completely independent of all other request/responses; the server doesn’t see a request and know that it came from a server that it has already seen or if it was a completely new request.
Let’s take a bank account as an example, specifically the “Hijack Bank” that I created for the demonstration of security concepts.
The action takes place starting on the login.php page as shown here:
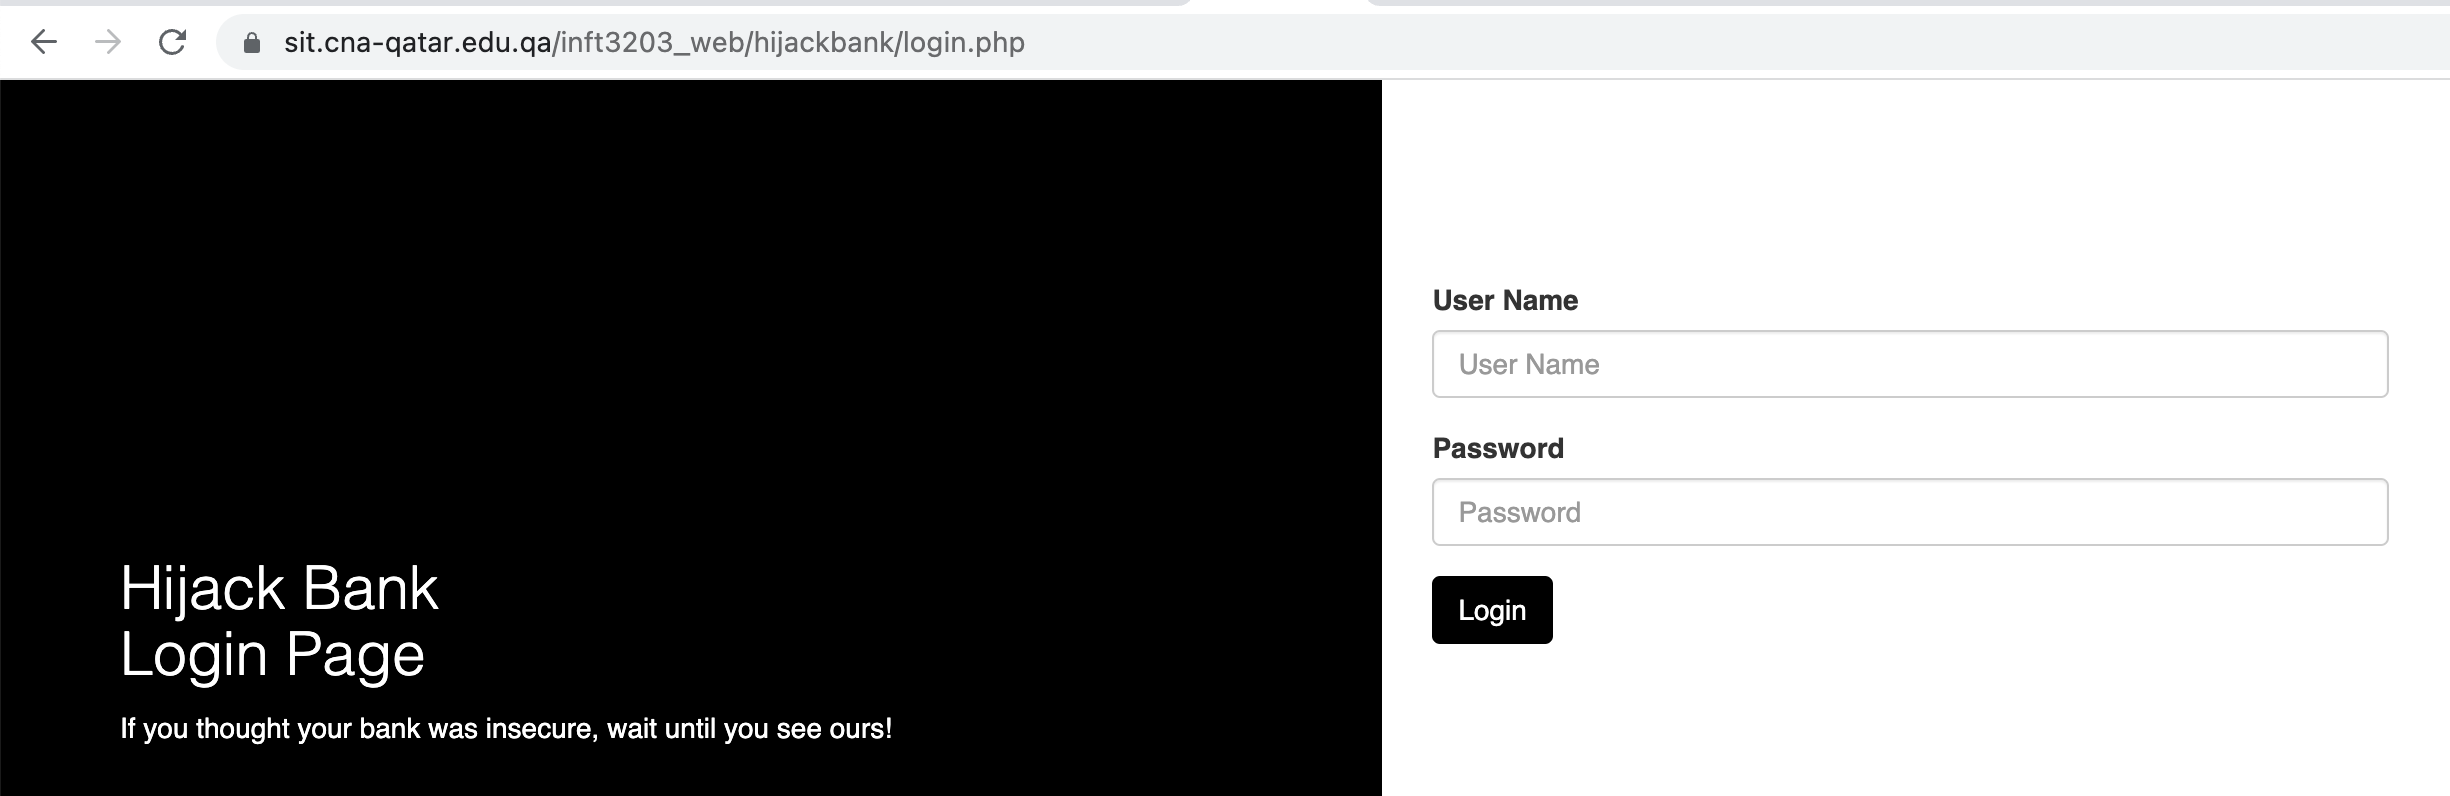
The HTML code behind the page is a very simple form:
<form method="post">
   <div class="form-group">
      <label for="username">User Name</label>
      <input id='username' type="text" class="form-control" placeholder="User Name" name="uname">
   </div>
   <div class="form-group">
      <label for="password">Password</label>
      <input id='password' type="password" class="form-control" placeholder="Password" name="pword">
   </div>
   <input type="hidden" name="login" value="Login">
   <button type="submit" class="btn btn-black">Login</button>
</form>
We know that when the user types in a valid password we end up on the page ‘account.php’ but what we see there depends on the username that was entered and if we were to just try and visit the page we end up back at the login.
If we were to use the manual web client to try and access the account.php page directly we would end up with a response like this:
HTTP/1.1 302 Found
Date: Thu, 13 Apr 2023 12:55:03 GMT
Server: Apache/2.4.41 (Ubuntu)
Expires: Thu, 19 Nov 1981 08:52:00 GMT
Cache-Control: no-store, no-cache, must-revalidate
Pragma: no-cache
Location: login.php
Content-Length: 24
Content-Type: text/html; charset=UTF-8
Set-Cookie: PHPSESSID=c8drclfp8u12avjstc46u5jqiv; path=/
Connection: close

You need to be logged in
This clearly indicates that the server doesn’t recognize us at all and this is why we are being sent to the login.php file. The message ‘You need to be logged in’ actually never gets shown to the user since the 302 redirect immediately sends the browser to the login page.
The redirect response actually does give us a very small hint about how the browser deals with this type of problem. You will notice that the response contained a cookie called PHPSESSID. This cookie is called the session cookie and each user that visits the site gets a unique session number that they can use to identify themselves.
If we go back and investigate the login process using just the manual web client we realize that we need to send a username, a pword, and a login parameter to the server in order to actually log in. One username/password pair on the Hijack Bank is 953671/JZ89. Let’s try sending a proper login form completion to see what we get as the response:
POST /inft3203_web/hijackbank/login.php HTTP/1.1
Host: sit.cna-qatar.edu.qa
Connection: close
Content-Type: application/x-www-form-urlencoded
Content-Length: 35

uname=953671&pword=JZ89&login=Login
Before sending lets cover a couple of items. The destination URI was selected as the login.php file. How did I know this? If you look at the form, you will see that there was no URL provided; if nothing is provided then the form will always send to the same URL. The names of the inputs are uname, pword and login. The login input was a submit so it shows as a button, the value was given and I used this on the server to determine if somebody is trying to submit a username/password or if they are just trying to see the login form. If you make any mistakes, you just get back a 200 OK message and the form is shown again but there will be an extra phrase “Invalid Login”.
Once we submit the form and the username/password combination is accepted we will now see a response similar to this:
HTTP/1.1 302 Found
Date: Thu, 13 Apr 2023 13:01:59 GMT
Server: Apache/2.4.41 (Ubuntu)
Expires: Thu, 19 Nov 1981 08:52:00 GMT
Cache-Control: no-store, no-cache, must-revalidate
Pragma: no-cache
Location: loginredirect.php
Content-Length: 0
Content-Type: text/html; charset=UTF-8
Set-Cookie: PHPSESSID=dmvdst4b4fgobuvh3fvivgkprc; path=/
Connection: close
The redirect tells us that we should visit the loginredirect.php page. The other important information here is the header ‘Set-Cookie’ which is requesting that we now send a PHPSESSID cookie to all pages on this particular server. This cookie is an identifier for our browser and the server will remember that the person who holds this cookie is the person who owns the account 953671.
We follow the redirection with the cookie value:
HTTP/1.1 302 Found
Date: Thu, 13 Apr 2023 13:07:43 GMT
Server: Apache/2.4.41 (Ubuntu)
Expires: Thu, 19 Nov 1981 08:52:00 GMT
Cache-Control: no-store, no-cache, must-revalidate
Pragma: no-cache
Location: account.php
Content-Length: 0
Content-Type: text/html; charset=UTF-8
Connection: close
Great, another redirect! It is different this time because it is telling the browser to now go to the account.php page. Why a second redirect? It has to do with the way that the application was written. There are two types of user accounts on this bank application, normal account users and bank administrators (I use the administrator account for a security course demonstration) and the loginredirect.php program looks to see what type of user just logged in and sends the user to the correct page. It was possible for me to write all of this into the login.php page but it seemed cleaner to put this in a separate file.
Let’s head off to the new URL again:
GET /inft3203_web/hijackbank/account.php HTTP/1.1
Host: sit.cna-qatar.edu.qa
Connection: close
Cookie: PHPSESSID=dmvdst4b4fgobuvh3fvivgkprc
This time we will get back a 200 OK message with the information about the bank account. I have not listed the details here because the HTML is somewhat large and there isn’t anything interesting from the HTTP point of view.
The cookie of course is the unique identifier but notice that it is just a single value without any meaning. The name of the user is not part of the cookie, it is just an identifier to let the server know we are a certain browser. The cookie is used by the server. Each time that a request comes to the server, the server will look to see if there is a cookie set. If not, then the login page is shown. If the cookie is set, then it looks in a small database on the server to figure out who this person is and then shows the correct information. In otherwords sessions are implemented using a cookie PLUS some information on the server.
If for some reason, a hacker was able to get ahold of the cookie value, they could actually become the user who is logged in. This technique is called session hijiacking which of course is where the name of the bank website comes from.
When the user logs out, the server just erases the information on the server side. Even if the browser comes back with the same cookie again later, the page would not be loaded because there was no session associated with that cookie.
2.22 JSON Web Tokens
Cookie based sessions are heavily used on the internet and even things like D2L use cookie based sessions. A technique that is used to help deal with sites with high volumes of data is called load balancing where each request gets routed to a different server so help split the work into multiple servers (more on that in the performance section of this course).
A problem with load balancing immediately appears when you start to deal with cookie based sessions. Remember that a cookie is just an identifier for a session but it doesn’t contain information such as who you are or what type of privilege you have. When you generate a cookie based session on one computer, that session lives on that one computer and the other load balancing computers do not know anything about the session. What was needed was a way for the identifier to contain this information but in a way that the end user could not “fake it”.
Let’s look at the potential hacking. Suppose that instead of the session id we send back a response like this:
HTTP/1.1 302 Found
Date: Thu, 13 Apr 2023 13:01:59 GMT
Server: Apache/2.4.41 (Ubuntu)
Expires: Thu, 19 Nov 1981 08:52:00 GMT
Cache-Control: no-store, no-cache, must-revalidate
Pragma: no-cache
Location: loginredirect.php
Content-Length: 0
Content-Type: text/html; charset=UTF-8
Set-Cookie: username=953671;type=user; path=/
Connection: close
Now when requests come in, the server could look at the username and type (could be user or administrator) then the server doesn’t need to figure out who the user is. The problem is that the client can change cookie values to whatever they want!
A technique was needed so that we could send back this information but somehow make sure that the information could not be tampered with by the browser.
I have a small demonstration (it is not complete yet) using a mechanism called JSON web tokens. We will look at the mechanics of this here and will save the discussion of the security aspects until the web security section of the course.
Lets look at the “jwt_bank” login page:
<label for='username'>Username:</label><input type='text' id='username'><br>
    <label for='password'>Password:</label><input type='text' id='password'><br>
    <button onclick='checkLogin()'>Login</button><br>
This page is of course completely different but I could have done it using a form. This time I created 2 inputs (username and password) and I included a Login button that calls some JavaScript to run the processing.
The JavaScript is mostly out of scope for this course but we still look at it because it is important:
function checkLogin() {
    let uname = $("#username").val();
    let password = $("#password").val();

    let loginCredentials = {
        username: uname,
        password: password
    }
    console.log(loginCredentials);
    $.ajax({
        url: "api/login",
        data: JSON.stringify(loginCredentials),
        method: 'post',
        contentType: 'application/json',
        success: function(res) {
            activeToken = res
            showBalance()
        },
        error: function() {
            $("#error-message").show();
        }
    })
}
The checkLogin() function packages up the username and password into a JSON object. The program then uses a technique called AJAX (asynchronous Javascript and XML) to send the data to the server. Notice the ‘contentType’ line! This time we are using application/json as the type rather than the url-encoded parameters and the data is sent using JSON format.
The request in the browser that gets sent to the server looks like this:
POST /inft3203_web/jwt_bank/api/login HTTP/1.1
Host: sit.cna-qatar.edu.qa
Connection: close
Content-Type: application/json
Content-Length: 39

{"username":"953671","password":"JZ89"}
The body of the message is JSON format which you should be familiar with from your database course where MongoDB was covered.
The result of sending this message is quite unusual:
HTTP/1.1 200 OK
Date: Thu, 13 Apr 2023 13:31:48 GMT
Server: Apache/2.4.41 (Ubuntu)
X-Powered-By: Express
Content-Type: text/html; charset=utf-8
Content-Length: 155
ETag: W/"9b-9ex2MQs+XPQTF4Bv+Hg9acSdeho"
Connection: close

eyJhbGciOiJIUzI1NiIsInR5cCI6IkpXVCJ9.eyJ1c2VybmFtZSI6Ijk1MzY3MSIsImlhdCI6MTY4MTM5MjcwOCwiZXhwIjoxNjgxMzkzMDA4fQ.FYDCKb87fIWn-DaSrRGH0O48i4xxhHr7KSn0EIc9ZUk
The header has nothing interesting in it except for the X-Powered-By which contains the word Express. This is because I used NodeJS express package as the back end server but it could have easily been PHP. the interesting thing is the body of the message which we will refer to as the token. The body contains the name of the user, a time when the token was generated and the time at which the token expires.
We can pass in the token using the manual web client:
GET /inft3203_web/jwt_bank/api/balance HTTP/1.1
Host: sit.cna-qatar.edu.qa
Connection: close
Authorization: Bearer eyJhbGciOiJIUzI1NiIsInR...(truncated)
The token goes as the Authorization line that we have seen before. When the request hits the server, the server looks at the token and extracts the account number so the correct information could be returned about that user. If the client tries to modify the token, say to pretend to be somebody else, the server would actually detect this and refuse the request. How the server verifies the token contents will be covered in the security part of the course.